If you’ve been reading my blogs, you’ve probably already read about core concepts, in-memory authentication, and database authentication, which are all critical aspects of Spring Security. I believe it is time for us to move on to the next crucial item on our agenda: authorization configuration.
The purpose of the authorization is to determine whether or not the request has the authority to carry out the task at hand. So we’ll create a Spring Boot project with a few APIs and learn how to permit or prohibit access based on who is signed in. So, let’s get started!
Setting up the project
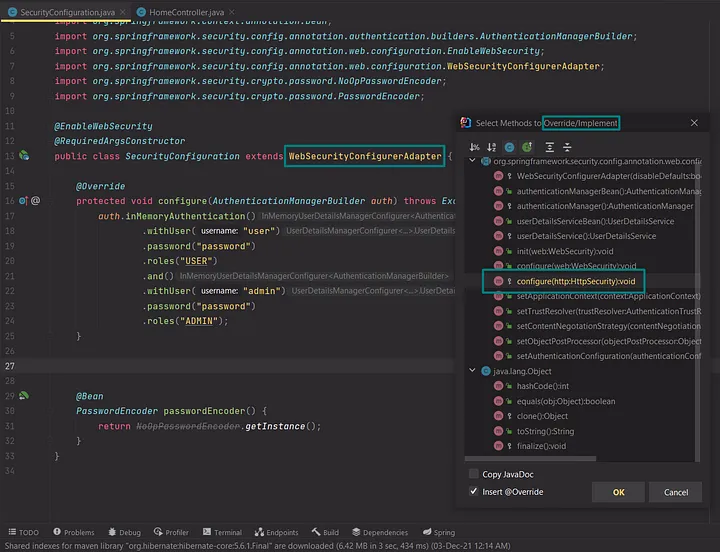
Now as we’ve arrived at the start of our tutorial, consider the following scenario: we have a standard Spring Boot application with Spring Web and Spring Security dependencies, as well as in-memory authentication enabled. A step-by-step explanation for this part is out of the scope of this article, however, you can read about it all in detail in another article here. In short, your security configuration class should look like this:
package com.example.springbootsecuritydemo.security;

import lombok.RequiredArgsConstructor;
import org.springframework.context.annotation.Bean;
import org.springframework.security.config.annotation.authentication.builders.AuthenticationManagerBuilder;
import org.springframework.security.config.annotation.web.configuration.EnableWebSecurity;
import org.springframework.security.config.annotation.web.configuration.WebSecurityConfigurerAdapter;
import org.springframework.security.crypto.password.NoOpPasswordEncoder;
import org.springframework.security.crypto.password.PasswordEncoder;

@EnableWebSecurity
@RequiredArgsConstructor
public class SecurityConfiguration extends WebSecurityConfigurerAdapter {

    @Override
    protected void configure(AuthenticationManagerBuilder auth) throws Exception {
        auth.inMemoryAuthentication()
                .withUser("user")
                .password("password")
                .roles("USER")
                .and()
                .withUser("admin")
                .password("password")
                .roles("ADMIN");
    }

    @Bean
    PasswordEncoder passwordEncoder() {
        return NoOpPasswordEncoder.getInstance();
    }
}
Creating resources
Consider Spring Security’s default behavior once we’ve completed the preparations. When we add the Spring Security dependency to the classpath, each request is automatically authorized by Spring Security. All APIs are only accessible if you log in to the system using your login and password.
What we want to do now is offer multiple degrees of access control for our APIs. We will first integrate these APIs into our application. We’re going to make a controller that looks somewhat like this:
package com.example.springbootsecuritydemo.controller;

import org.springframework.web.bind.annotation.GetMapping;
import org.springframework.web.bind.annotation.RestController;

@RestController
public class HomeController {

    @GetMapping
    public String home() {
        return "<h1>Welcome</h1>";
    }

    @GetMapping("/user")
    public String user() {
        return "<h1>Hello Authenticated User/Admin!</h1>";
    }

    @GetMapping("/admin")
    public String admin() {
        return "<h1>Hello Admin!</h1>";
    }
}
What we want to do next is enable Spring Security access control and set the first API “/” to be accessible to everyone (unauthenticated users), the second API “/user” to be accessible to every authenticated user (whether they have the role “USER” or “ADMIN”), and the third API “/admin” to be accessible to every authenticated user who has the role “ADMIN” (someone who has logged in and has a role “USER” should not be able to access this API).
Obtaining the Authorization object
Now it’s time to set up the authorization. This type of scenario is pretty common in most applications. As a result, we’ll be covering a wide range of common use cases. You may specify the paths and access restrictions for those paths using HttpSecurity object.
However, before we learn that, we must first figure out how to obtain that object. The answer is quite similar to how you got the authentication object in the first place. That’s done by overriding the configure() method of the WebSecurityConfigurerAdapter class, which takes an HttpSecurity object as an argument:
Remove the super() call, and we’ll define our instructions using method chaining, just like we did with authentication configuration. So the authorizeRequests() method on the HttpSecurity object opens up the chain, and then we give the path-to-permission mappings:
@Override
protected void configure(HttpSecurity http) throws Exception {
    http.authorizeRequests()...
}
Enabling access control
A method named antMatchers() is used to define paths, and it allows us to supply path patterns with wildcards. To save time, we don’t need to add permissions to each and every path. The rules are simple to understand. This antPattern “/**” means all routes at the current and nested levels, for example.
We define roles using the hasRole() method, which takes a String describing the required role as argument. The hasAnyRole() method, which takes a variable number of arguments, may be used to map a route to many roles.
@Override
protected void configure(HttpSecurity http) throws Exception {
    http.authorizeRequests()
            .antMatchers("/**").hasRole("ADMIN");
}
Configuring login type
We can also indicate the type of login we want Spring Security to do after we’ve configured the mappings. By chaining .and().formLogin() at the end of the setup, we can instruct the app to use form login. The form login is the default with Spring Security, however other login alternatives are available too.
@Override
protected void configure(HttpSecurity http) throws Exception {
    http.authorizeRequests()
            .antMatchers("/**").hasRole("ADMIN")
            .and().formLogin();
}
Testing our application
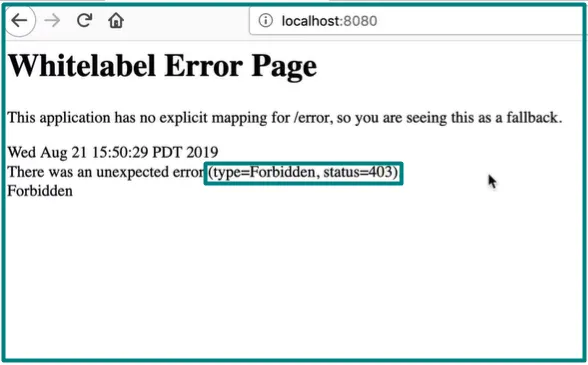
So, if we configure our authorization to allow only those with the “ADMIN” role access to the root path, when we start our application and log in with the credentials of a user with the role “USER”, we’ll receive the Whitelabel Error Page with the status code 403 signaling that the path is forbidden.
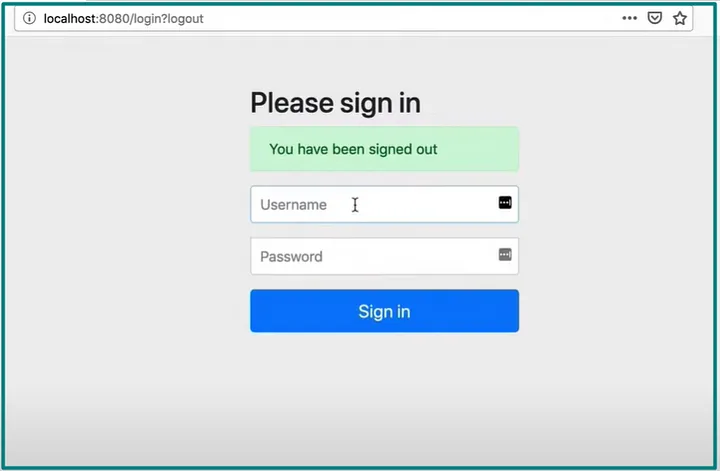
But what if we want to log out of the app in order to log in with a different user? Have we supplied a link to a logout page? Fortunately, Spring Security takes care of the logout page as well, as it did in case of a login page. A “/logout” endpoint has already been defined. It will prompt us for confirmation before gracefully logging us out.
We can visit the root path and receive a greeting message when we log in with the user who has the role “ADMIN”.
Completing authorization configuration
So, let’s adjust our settings to something more sensible. First and foremost, we must give the user access to static assets like as CSS or JS files, w hether the user is signed in or not. We instruct Spring Security to allow any type of access by using permitAll() method, which gets the user off the hook with any type of authorization:
@Override
protected void configure(HttpSecurity http) throws Exception {
    http.authorizeRequests()
            .antMatchers("/").permitAll()
            .antMatchers("/**").hasRole("ADMIN")
            .and().formLogin();
}
Then we must configure access controls, starting with the most restrictive and working our way down to the least restrictive. The most restricted URL is “/admin”, which may only be accessed by a limited number of users. The reason for this rule is that if we put something least restrictive at the top, such as “/,” it will match all of the paths and never get to the most restrictive ones. We proceed in the same manner for the rest of the paths that need to be configured:
@Override
protected void configure(HttpSecurity http) throws Exception {
    http.authorizeRequests()
            .antMatchers("/admin").hasRole("ADMIN")
            .antMatchers("/user").hasRole("USER")
            .antMatchers("/").permitAll()
            .and().formLogin();
}
There’s one more thing we need to perform before we test our application. Because Spring Security does not yet know that the String “ADMIN” has a higher privilege than “USER,” our “ADMIN” user will not be allowed to access “/user” at this moment. To inform the application about this hierarchy, we need to modify the access to the “/user” endpoint with method hasAnyRole() as follows:
@Override
protected void configure(HttpSecurity http) throws Exception {
    http.authorizeRequests()
            .antMatchers("/admin").hasRole("ADMIN")
            .antMatchers("/user").hasAnyRole("ADMIN", "USER")
            .antMatchers("/").permitAll()
            .and().formLogin();
}
Now you can test your application and see the results!
We’ve reached the end of this tutorial. This was a pretty quick rundown of the features. Spring Security authorization may be configured for a variety of purposes, but in this article, I have shown you the way to set it up. As a result, everything you’ve learned may be applied to any Spring Security application.
Now that we’ve covered the basics of Spring Security authentication and authorization, we can progress to a somewhat more advanced stuff, so don’t miss the articles that follow!