With web development, the hardest part is the beginning. I’ve had had many sleepless nights, sitting in front of a laptop just wondering, why doesn’t this website want to work? While sites like Stack Overflow are absolutely amazing, no website I’m aware of contains an up-to-date end-to-end tutorial for creating a website. So, I decided to make a small guide for the lost souls just like my younger self. I present to you the definitive 2021 guide to creating a website from scratch with java and google cloud, for free (sadly, creating the custom www.yourname.com domain isn’t included… yet!).
Section for the not-so-creative
Defining the idea
It might sound silly at first, but writing down your idea of a glorious website is not as easy: many things that seem easy are very hard — even impossible to do within a day. So let’s start out as simple as we can.
We’ll make a website that prints a welcome message to the screen! We’ll then deploy (a fancy term for giving the website an http:// address on the web) the website and, very importantly, send this HTTP link to our friend/boss/crush to see their reaction. After that, and only after that, we will make a fully-fledged website with, possibly your very own resumé on it. So let’s get coding!
2 + 2 = Java
Defining the website’s brains
Creating a “Hello, World” website with Spring Boot is a fairly simple process. We will build a service that will accept requests at http://localhost:8080 (Meaning that it will run on your computer, just for testing).
To start from scratch, you can move on to Starting with the Spring Initializr (yeah, that’s not a typo) section. To skip the basics, do the following:
- Download and unzip the source repository for this guide, or clone it using Git with this link.
- Open the project in your IDE (I use IntelliJ for this tutorial) and run the maven build.
- Start the application.
Starting with Spring Initializr
To initialize the project:
- Navigate to https://start.spring.io. This service pulls in all the dependencies you need for an application and does most of the setup for you. An even easier alternative would be to open your IntelliJ new project window, select Spring Initializr in the list, and bootstrap your project right away.
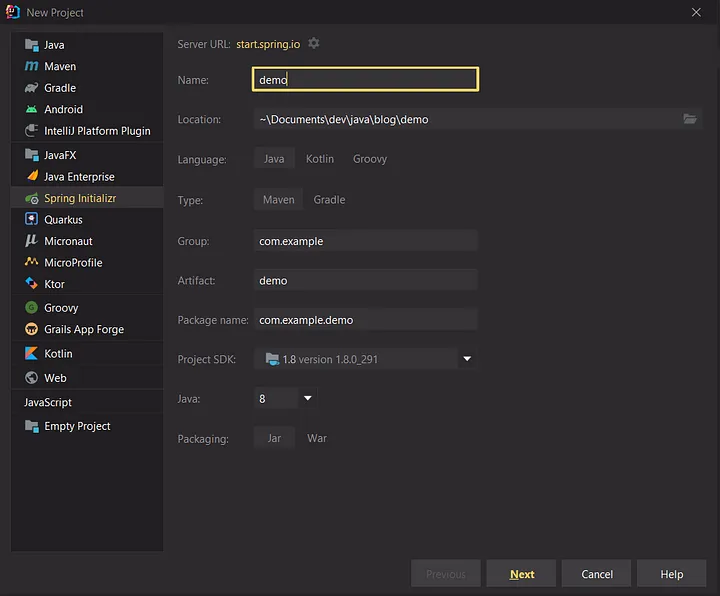
-
Choose Maven and Java.
-
Select Spring Web from Dependencies and generate your brand-new application.
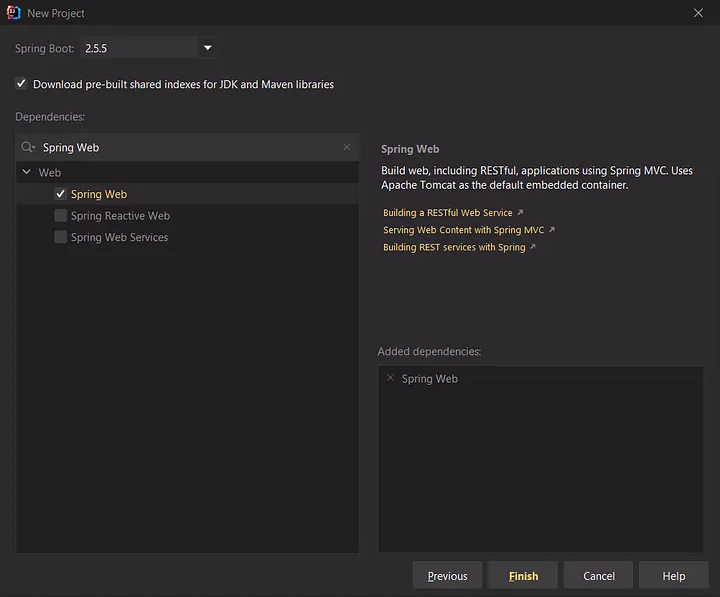
- You may download the resulting ZIP file, which is an archive of a web application that is configured with your choices or just prepare to start coding if you bootstrapped the project from your IDE.
Create a Resource Controller
A controller is Spring’s approach to handling HTTP requests. The Controller shown in the following listing handles GET requests by returning “Hello World!”
package com.example.gcpdemo;

import org.springframework.web.bind.annotation.GetMapping;
import org.springframework.web.bind.annotation.RestController;

@RestController
public class Controller {

    @GetMapping("/")
    public String hello() {
        return "Hello World!";
    }
}
Spring’s @RestController annotation marks the class as a controller where every method returns a domain object instead of a view and @GetMapping annotation ensures that HTTP GET requests to “/” are mapped to the hello() method — easy!
With all that aside, congratulations! You have just set up your application. Imagine, it’s just that simple with Spring Boot — several lines of code, no need for further configuration. The only thing left right now is to start the application and check the result on http://localhost:8080.
By the way, if your default 8080 port is busy handling other processes and you are getting an error, you can easily configure the embedded Tomcat server to start the application on any other port by writing the following line in your resources/application.properties file:
server.port=8081 # or any other port you want
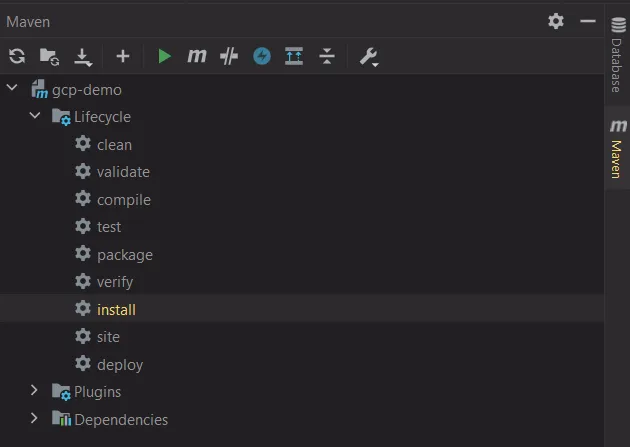
The last step in this section would be to build the application via the Maven or Gradle assistant tool to produce an executable jar file.
Dock, Docker, and the Dockest
Making your application portable with docker
Docker is the lifeline of the modern web. It allows us to seamlessly update the one-million-users-per-day website with several keystrokes (which can be automated even). For a refresher on docker, please visit the official tutorial.
With that aside, create a file named “Dockerfile” in the root folder and fill it with the following lines:
FROM openjdk:8-alpine
COPY . /usr/src/myapp
WORKDIR /usr/src/myapp
CMD ["java", "-jar", "target/gcp-demo-0.0.1-SNAPSHOT.jar"]
The great thing about it is that even if you don’t understand a single line of docker language, you can still update your website by just making a small cheat sheet with several commands that you can run on your laptop. These commands are:
$ docker build . -t my-awesome-website # Build the 'canned' website
$ docker run -it --rm -p 8080:8080 my-awesome-website # Run the website
The docker build command builds Docker images from a Dockerfile and a “context”. A build’s context is the set of files located in the specified path, in our case — the root folder. -t flag tags the image with the immediately following name parameter.
-it flag is really important as it allows us to see what’s happening inside the container. Without it, the container would run in the background. — rm flag removes intermediate containers after a successful build and -p 8080:8080 maps port 8080 of the host to port 8080 in the container.
It’s as easy as that!
The elephant on the web
Uploading the website to google cloud
Google cloud platform (GCP for short) is something we call PaaS (Platform as a service). Meaning that you don’t need to own a server in order to have a website, Google provides all that for you, for free. All you have to do is go to GCP, register, and then visit your console.
From here, navigation can get a bit tricky as the catalog of GCP services is so absurdly vast that you can literally get lost on the website, and never return. So, follow carefully and try to focus.
In the Google Cloud Console, on the project selector page, select or create a Google Cloud project. Make sure the billing is enabled for your Cloud project. Also, check that you have actually enabled Container Registry API in your project by following the steps in this guide.
To continue with the process, you have to launch Cloud shell from the menu bar by clicking the Activate Cloud Shell button. A cloud shell session will open inside a frame lower on the console. You will need this shell to run gcloud commands.
Before you can push or pull images, you must configure Docker to use the gcloud tool to authenticate requests to Container Registry. For that, run the following command:
gcloud auth configure-docker
This command updates your Docker configuration. Now you can connect with Container Registry in your Google Cloud project to push and pull images.
After having enabled the service, from the left menu select Compute Engine and then — VM instances. Create a new instance and leave the default configuration for the most part. There are only a few things that need our attendance.
As GC firewall is The Great Wall equivalent around all your applications. This defense mechanism won’t allow pervasions, we have to open some ports for communication ourselves, if we want to enable communication with our newly created website. For that, search for a firewall in the search bar and create a new firewall rule with just one button click. Give it a name (all-in, for example), select the direction of traffic, incoming traffic (Ingress) at first. In the protocols and ports section, only for the purposes of our demo project, select Allow all option (please, select specified protocols and ports for security in your future projects). Do the same for the outbound traffic (Egress).
After you have successfully tagged your image locally and pushed it to google cloud by following the guide, on your google platform in the container section click the button deploy container, fill in your container image address on google cloud (it will start with gcr.io/…). Then in the firewall section check both boxes allowing HTTP and HTTPS traffic.
Having done all that, pull down the networking menu at the end of the form and insert names of your newly created firewall rules as the network tags. After that hit the create button and you are all set to go.
Promises not kept… yet
Making a resume-worthy website
In the next part of this guide, I’ll explain how to find and modify already existing website templates to make your awesome resume site.